
How I Made My Animated Christmas Sign

While browsing the internet for ideas for the light show I came across instructions on how to make an animated Merry Christmas sign using rope light. I liked the idea but there were some elements in the original that I needed to change.
The original instructions can be fournd here: http://www.christmasinkent.com/howto/HowToMCsign.htm
- First was the size. The original size was approximately 4' tall and 21' long. That was a bit too big for the front of my house so I resized it to 3' tall and 17' wide. Changing the size also helped with being able to store it in my garage during the off-season.
- Second thing I changed was the metal fence used in the assembly. The original used rigid panels 4' tall and 16' wide. I used 3' tall galvanized wire roll fencing I found at Home Depot. My fence had a grid spacing of 2" X 4" which also made it easy to layout the rope light to the fence.
Video Showing The Sign At Night
To make the sign I used the same font as the original plan - Freestyle Script. I originally did not have the font installed on my computer but I found it on my MS Office 2003 Professional CD. After installing the font on the PC it was now available to all programs on the PC.

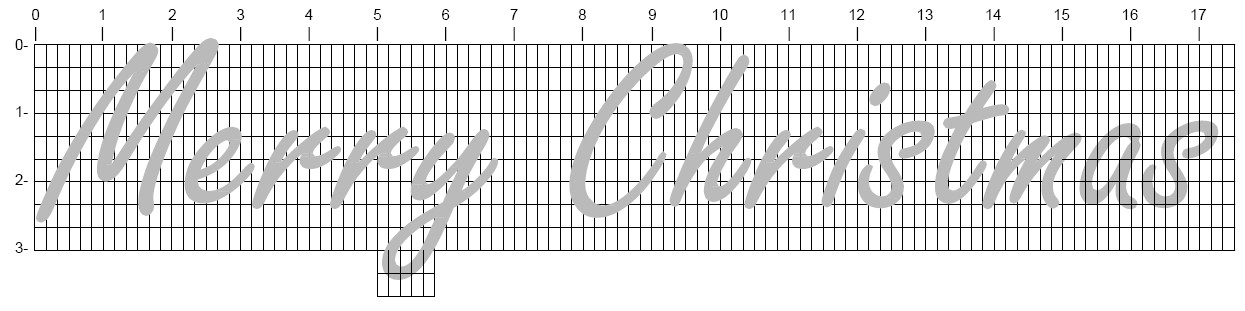
In order to form the ropelight into the letters onto the fence I needed a way to 'transfer' the layout of the letters to the fence. The original plan used a projector to shine the image onto the fence but I did not have access to a projector. The method I used was to draw the fence grid in AutoCad LT 2005 and then used the text tool to place the text over the grid. This would allow me to print each letter individually to see exactly where on the fence to place the letters. With the addition of division marks on the drawing I was able to get within 1/4" accuracy. The following are some screen shots from the AutoCad drawing.
 |
The letter 's' showing the 1/4" division tick marks. Click on the image to see fullsize. |
For those that may be interested in making the sign I have provided a PDF document that contains all of the individual letters and shows how each letter is laid out on the fence with all required measurements.
To make the sign I decided to make it in three seperate panels to aid in installation and storage of the sign. The three panels ranged in size from 5' wide to 7' wide depending on where it would be a good place to put a break. The breakdown of the three panels are diagramed below.
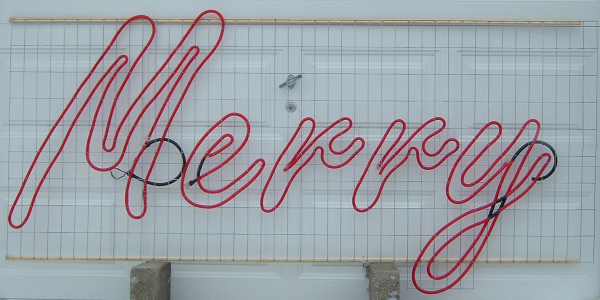
Panel 1
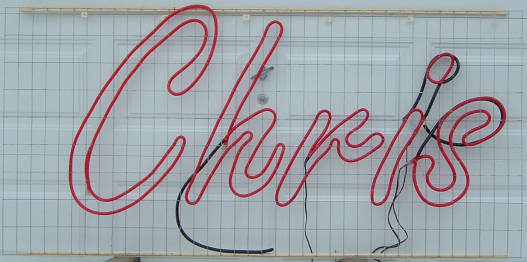
Panel 2
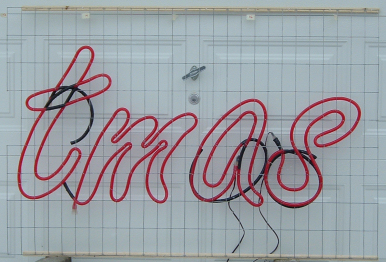
Panel 3
It is hard to see in the image but you may notice that the left side of panel 3 has a small cutout. This is for the letter 's' to fit into when the panels are assembled. All of the panels also have a small 4" overlap so that the panels can be connected to each other when assembled.